Pipe Tape Insulation helps protect exposed pipes from heat loss, condensation, and uncomfortable surface temperatures. It usually combines a flexible insulating layer with a strong adhesive backing. Wrapped around a pipe, the material creates a barrier between the pipe surface and surrounding air. Simple in appearance, it performs an important job.
In homes, workshops, and commercial buildings, this tape can support more stable water temperatures and reduce unwanted energy transfer. For example, a cold-water pipe may collect droplets in a humid basement. Properly applied insulation can limit that condensation. On a hot-water line, it may help the pipe retain warmth as water travels toward a tap. Small details matter. Clean surfaces matter. Correct overlap matters.
However, Pipe Tape Insulation is not a universal fix. It cannot repair leaks, replace damaged pipework, or compensate for poor installation. Its performance depends on pipe material, temperature, moisture exposure, and product quality. Always check the manufacturer’s temperature range and application instructions. This is where real-world judgment becomes important. A tape that works well on a dry indoor pipe may fail outdoors or near intense heat. I have found that rushed wrapping often leaves gaps around joints and valves. Those weak points are easy to overlook.
This guide explains what Pipe Tape Insulation is, how it works, and where it makes practical sense. It also considers common installation mistakes, maintenance needs, and situations requiring professional advice. A careful assessment comes before the tape. That step is often missed.
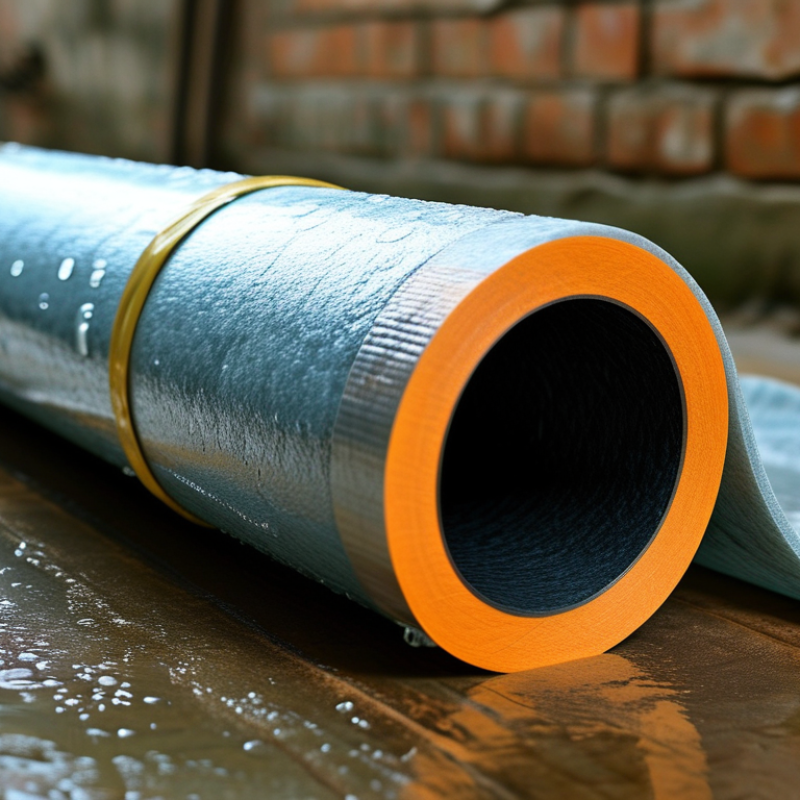
What Pipe Tape Insulation Is: Materials, Uses, and Key Standards
Pipe tape insulation is a flexible wrapping material designed to reduce heat transfer around pipes. Common versions use polyethylene foam, elastomeric rubber, fiberglass, or multilayer foil. Each material behaves differently. Foam is lightweight and moisture-resistant, while fiberglass tolerates higher temperatures but needs careful handling.
Its main uses include limiting heat loss from hot-water lines, reducing condensation on chilled pipes, and protecting outdoor pipework from short-term temperature changes. The tape usually works through trapped air within its structure. This air slows conduction, while the outer layer can reflect radiant heat or resist moisture. Installation matters greatly. A clean, dry pipe, tight overlaps, and sealed joints prevent thermal bridges. Gaps are small, but their effect is not.
Standards help confirm whether a product suits the application. Look for documented thermal conductivity, temperature limits, water-vapor resistance, and fire performance. Relevant requirements may reference ASTM or EN test methods, local plumbing codes, and energy-efficiency rules such as ASHRAE guidance. The exact standard depends on the pipe, building, and climate. A tape rated for indoor cold-water lines may fail beside a boiler. It is tempting to trust thickness alone, yet thickness does not guarantee performance. Field checks should include loose edges, wet insulation, and damaged seams. Even experienced installers can miss these details. Consulting the product’s technical sheet and local code authority remains the safer practice.
How Thermal Performance Is Rated: R-Value and ASTM C177/C518 Tests
Pipe tape insulation is a thin wrap designed to slow heat transfer around pipes. Its thermal performance is commonly expressed through R-value. R-value indicates resistance to heat flow, so a higher value usually means better insulation. However, the number can look more precise than field conditions allow. Pipe diameter, tape thickness, surface contact, and installation tension all affect actual performance.
ASTM C177 uses a guarded hot plate to measure heat flow through a controlled insulation specimen. ASTM C518 uses a heat flow meter and measures thermal conductivity under defined temperature conditions. Both methods require stable laboratory settings, including specimen thickness, temperature, and contact pressure.
Their results help compare materials. They do not perfectly represent a wrapped pipe exposed to vibration, bends, or uneven surfaces.
For curved pipes, the published R-value may reflect a flat sample rather than the installed tape. Stretching the tape can reduce its thickness and lower resistance. Small gaps create thermal bridges. Moisture changes performance too. A practical inspection should check seams, overlaps, compression, and damaged areas. Field measurements are rarely tidy. When reading test data, confirm whether the R-value is reported for the installed thickness or calculated from thermal conductivity. That detail is easy to miss, and it can change the expected result.
How It Works: Limiting Conduction, Convection, and Surface Heat Loss
What Is Pipe Tape Insulation and How Does It Work?
Pipe tape insulation is a flexible wrap applied around pipes to reduce unwanted heat transfer. It works by adding a thin barrier between the pipe surface and surrounding air. The tape slows conduction, which is heat moving through the pipe wall and insulation layer. It can also seal small gaps where air might circulate.
Convection matters when warm air rises from an exposed pipe. This movement carries heat away, especially in open plant rooms or cold service areas. Properly applied tape limits airflow across the pipe surface and reduces surface heat loss. Some reflective tapes may also redirect a portion of radiant heat. However, tape is not a replacement for thick insulation. Its performance depends on material, thickness, temperature, and installation quality. In real maintenance work, results can be uneven.
Tips: Clean and dry the pipe first. Wrap with steady overlap and avoid loose edges. Check valves, joints, and bends carefully, because these areas often lose the most heat. Do not compress soft insulation excessively. Measure surface temperature before and after installation when possible. A small test section can reveal whether the chosen tape is suitable. Personally, I would not trust appearance alone; a neat wrap may still leave hidden gaps.
Installation Sequence: Clean, Wrap, Overlap, Seal, and Inspect
What Is Pipe Tape Insulation and How Does It Work?
Pipe tape insulation is a flexible barrier wrapped around pipes to slow heat transfer. It can reduce heat loss from hot-water lines and limit condensation on chilled pipes. The U.S. Department of Energy states that insulating hot-water pipes may raise water temperature by 2–4°F and support lower thermostat settings. The result depends on material, thickness, climate, and installation quality.
Installation Sequence: Clean, Wrap, Overlap, Seal, and Inspect
Clean the pipe first. Remove dust, oil, rust flakes, and moisture with a dry cloth. Tape will not bond well to a dirty surface. Measure the pipe and plan the overlap before wrapping. Begin at one end, keeping steady tension without stretching the insulation excessively. Overlap each turn by about half the tape width, unless the product instructions specify another ratio. Keep the layers smooth.
Overlap matters most at joints, valves, and bends. Seal the final edge carefully. Use compatible sealing tape or approved adhesive, especially where moisture may enter. ASHRAE guidance emphasizes continuous insulation and vapor-retarder integrity for condensation control. Inspect every seam by hand. Look for wrinkles, exposed pipe, loose corners, and compressed sections.
Small gaps matter.
I have seen neat-looking wraps fail at elbows. That mistake is easy to repeat. A second inspection after temperature changes may reveal shrinkage or lifting. Pipe supports also need attention; compressed insulation can become a thermal bridge. Measure again, correct weak spots, and record the material and installation date for later maintenance.
What Is Pipe Tape Insulation and How Does It Work?
Installation Sequence: Clean, Wrap, Overlap, Seal, and Inspect
A continuous tape-insulation layer reduces direct heat transfer and helps protect pipe surfaces from moisture and condensation.
The chart summarizes practical installation targets: the pipe should be fully clean and dry, adjacent tape courses commonly overlap by about 50% of the tape width,
exposed joints and ends should be sealed, and the finished wrap should be checked for gaps, wrinkles, lifting edges, and damaged areas.
Always follow the specific tape product instructions when they differ.
Elastomeric Tape Benchmarks: λ 0.035–0.045 W/m·K and Service Temperatures
What Is Pipe Tape Insulation and How Does It Work?
Pipe tape insulation is a flexible, closed-cell material wrapped around pipes, valves, and small fittings. It slows heat transfer by trapping air inside its cellular structure. It also limits surface condensation when chilled pipes run through humid plant rooms.
The key benchmark is thermal conductivity, or lambda (λ). Published elastomeric insulation data commonly falls near 0.035–0.045 W/m·K at laboratory reference temperatures. ASHRAE Handbook—Fundamentals reports comparable conductivity ranges for flexible cellular insulation. Testing standards such as EN 12667 and ASTM C177 measure thermal performance under controlled conditions. These figures are useful, but they are not guarantees.
Temperature changes the result. Elastomeric materials often perform across approximately −50°C to 110°C, depending on formulation and certification. Always check the product’s tested service range. Higher temperatures can increase conductivity and reduce long-term resilience. Moisture, compression, dust, and poorly sealed overlaps also weaken performance. Small gaps matter.
Installation experience shows another issue. Tape may look continuous while leaving a cold bridge beneath a clamp. That detail is easy to miss. A firm, even wrap improves contact, but excessive tension can thin the insulation. The stated λ value also assumes controlled testing, not a crowded ceiling filled with wet surfaces and moving air. That limitation deserves attention.
Conclusion
Pipe Tape Insulation is a flexible insulation material used to wrap pipes, valves, fittings, and other surfaces that need protection from heat transfer and condensation. It may be made from elastomeric foam or other low-conductivity materials, and its performance is commonly evaluated through thermal conductivity and R-value measurements. ASTM C177 and ASTM C518 tests help determine how effectively the material resists heat flow under controlled conditions. Elastomeric tape typically has a thermal conductivity of approximately 0.035–0.045 W/m·K, while its suitable service temperature depends on the material formulation and application environment.
The insulation works by reducing conduction through the pipe surface, limiting air movement that can increase convection, and lowering surface heat loss. For reliable results, installation should follow a clear sequence: clean and dry the pipe, wrap the tape evenly, overlap each turn, seal joints and ends, and inspect the finished covering for gaps, compression, or loose sections. Proper installation improves thermal efficiency, helps control condensation, and supports long-term protection.
 Kingflex
